Stop Spatter Ingress in Bearings for Welding Robots
A wrist joint passes commissioning with smooth rotation, then starts to grind, drift or run warm a few months after it is installed next to the torch. Is the bearing defective, or is something getting in? For Bearings for Welding Robots, the answer is usually contamination first and bearing quality second. Weld spatter, fume and grease break-down reach the raceway by a short, traceable path. This article gives you the order in which to check that path, what each observation may mean, and when to stop and escalate.

Symptom First: What You Have Observed and What It Does Not Prove
Start by writing down the symptom without naming a cause. Typical reports from maintenance teams include:
Rising joint friction or motor current on one axis, usually the wrist or the torch-side joint.
Growling, ticking or irregular noise during slow rotation.
Positioning drift or repeat-point scatter that returns after re-teaching.
Dark, crusted or glazed grease visible at the seal edge.
None of these confirms spatter ingress. Preload loss, loose mounting bolts, a worn reducer or a cable drag issue can produce the same signs. Treat spatter as the leading hypothesis because it fits the location, not because it is proven.
Stop condition: if the joint binds, locks or shows sudden play, take the axis out of production before any further testing. Continuing to run a damaged raceway spreads debris and turns a bearing repair into a joint repair.
Why Do Robot Bearings Fail Near Welding Cells
The failure sequence is mechanical and fairly predictable. Spatter particles are small, hot and hard. They land on the housing, seal lips and gaps around the wrist, and they weld or embed themselves on the surface. Fume then condenses on the same area and mixes with grease, forming an abrasive paste. Once that paste sits at the seal lip, each rotation drags it a little further inward.
| Contamination path | What happens | Typical visible sign |
|---|---|---|
| Direct spatter hit on seal lip | Lip is cut, glazed or hardened; contact pressure drops | Pitted or shiny lip surface, particles at the seal edge |
| Fume deposit near the gap | Fine particles mix with grease and form abrasive paste | Dark crust around the joint split line |
| Heat soak from torch and workpiece | Grease thins or hardens, seal material ages faster | Grease bleed, dried residue, hardened seal |
| Pressure cycling in the joint | Breathing draws contaminated air past a worn lip | Contamination appears inside after cooling cycles |
This is why a welding robot bearing seal cannot be judged on its own. Its performance depends on what shields it, which way it faces and how often it is cleaned.
Diagnostic Order: What to Check, What It May Mean, What Next
Work from the cheapest, least invasive check to the most involved. Do not open the joint until the earlier steps are recorded.
Review records. Note when the symptom began, whether it followed a torch change, a program change, a new wire or gas setting, or a cleaning event.
Inspect the exterior with the robot powered down and locked out. Look at the seal area, covers and split lines.
Rotate the axis by hand or at low speed if your procedure allows it, and listen and feel for roughness.
Check mounting and preload condition against the drawing, including bolt torque where the joint design permits.
Sample the grease only if your robot maker permits access, and only after the earlier steps.
| Observation | May indicate | Next action |
|---|---|---|
| Spatter beads stuck on or beside the seal lip | Inadequate shielding or exposed seal orientation | Clean carefully, add or repair the shield, then re-check noise and friction |
| Clean exterior, but rough rotation | Internal damage, preload change or a mounting problem | Check mounting; if unresolved, escalate for teardown inspection |
| Dark gritty grease only on one side of the joint | Directional exposure to the torch or fume plume | Review torch angle, extraction position and shield coverage on that side |
| Smooth rotation, but position drift | Backlash from another component, not necessarily the bearing | Check the reducer, couplings and fasteners before blaming the bearing |
| Sudden roughness after a collision | Impact damage, not contamination | Stop and escalate; do not assume spatter |
Keep three categories separate in your notes: what you saw, what it may mean, and what you have confirmed. Only a teardown or lab inspection of the removed bearing normally moves a hypothesis into the third group.
Shielding, Purge Paths, Seal Orientation and Maintenance Intervals
This is where weld spatter protection is won or lost. Each measure blocks a different step in the contamination path, so none of them replaces the others.
| Measure | What it prevents | Fits when | Limit |
|---|---|---|---|
| Shielding (covers, spatter jackets, deflector rings) | Direct hits on the seal and housing gap | The joint sits within line of sight of the torch | Damaged or loose covers trap spatter against the seal; inspect them regularly |
| Purge path (clean air or inert gas through a controlled outlet) | Fume and fine particles entering the gap | The cell produces heavy fume or the joint breathes with temperature | Depends on the robot design; a poorly routed purge can push particles toward the seal |
| Seal orientation (lip facing away from the main contamination source, labyrinth before the lip) | Particles being pressed into the lip contact | Housing design allows a choice of seal direction or an added barrier | Not a fix for a fixed joint design; confirm with the drawing |
| Maintenance interval (clean, inspect, re-grease) | Crust and paste buildup at the seal | Every cell, but set the frequency by observed spatter load | Over-aggressive cleaning with scrapers or compressed air can drive debris inward |
How to Set an Interval Without Guessing
Start with a short interval for the first inspections. Record how much crust, spatter and grease change you find each time. If the seal area is consistently clean, extend the interval one step. If crust returns quickly, shorten it and improve shielding before touching the interval again. We do not publish a universal hour or cycle count for this, because spatter load varies with process, wire, current and torch angle.
Connecting Cause, Action and Result Check
A corrective action only counts if you can confirm the original symptom changed. Pair every action with a check.
| Probable cause | Distinguishing evidence | Action | Result check |
|---|---|---|---|
| Spatter on seal lip | Embedded beads, cut or glazed lip | Replace the damaged seal or bearing, add shielding | Friction and noise return to baseline; seal stays clean at the next inspection |
| Fume and grease paste | Dark crust, gritty grease on one side | Clean gently, re-grease per the robot maker, adjust extraction or purge | Crust rate drops over successive inspections |
| Heat-aged grease | Dried or bled grease, hardened seal | Review heat exposure, add a heat shield, correct the lubricant if the maker allows | Joint temperature and torque stable across a full shift |
| Mounting or preload fault | Clean seals, rough or loose rotation | Correct fit, bolt torque or housing issue | Runout and rotation feel within the drawing requirement |
An Illustrative Scenario
Say a robot wrist runs warm and shows drift. The exterior inspection finds spatter beads on one side of the seal and dark grease crust on that side only. The opposite side is clean. That pattern points to directional exposure, so the first action is a shield on the exposed side, not a lubricant change. After the shield goes on and the seal is replaced, you track friction and drift over the next several inspections. If the drift persists with clean seals, the bearing was never the whole story and you move on to the reducer and mounting.
Common Mistakes
Blasting the joint with compressed air, which drives particles past the lip.
Scraping spatter off the seal with a hard tool and cutting the lip.
Replacing the bearing without fixing shielding, so the new part fails the same way.
Treating every failure as spatter without checking mounting, collision history or the reducer.
Extending the maintenance interval because the last inspection looked fine once.
Selecting Bearings for Welding Robots and Their Sealing Arrangement
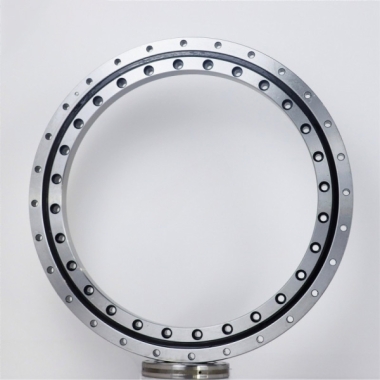
When a joint design is still open or you are replacing a part, start from the contamination route, not the catalogue. Ask four questions: where does spatter land, which way does the seal face, how much shielding space exists, and what runout and stiffness does the joint need. For compact wrist and arm joints, precision crossed roller bearings are a common choice because one bearing carries radial, axial and moment loads. Our BRE Series Crossed Roller Bearings and BRU(CRBF) Series Crossed Roller Bearings are useful starting points for that discussion. Positioners and turntables in the same cell may call for rotary table bearings.
What BY Bearings can back with facts: we have 15+ years of precision bearing manufacturing, grinding accuracy up to P2 class with runout controlled within 1.5 μm, and 100% inspection before shipment. Our products carry CE, RoHS and TUV certification, and OEM and ODM customization is supported, including special dimensions and mounting holes. We have supplied crossed roller bearings for semiconductor equipment in Germany, a clean-environment application rather than a welding one, but it reflects the same inspection routine. A precise bearing helps only when the joint keeps contamination out, so we treat sealing and shielding as part of the selection discussion, not an afterthought. Details of our quality control process are available on request.
Prevention Checks and When to Escalate
Build a short recurrence routine: inspect shields and seal edges at each scheduled stop, log spatter and crust condition with a photo, and record any torch, program or consumable change that could alter the spatter pattern. If two inspection cycles in a row show growing contamination despite shielding, the problem is the design of the protection, not the bearing.
Escalate when:
Rotation stays rough after external cleaning and a mounting check.
Grease shows metallic or gritty content you cannot attribute to a clear source.
The joint has seen a collision, or the symptom started suddenly.
Opening the joint would go beyond what your robot maker allows.
For a support request, send the bearing designation or drawing, the joint position and load description, operating cycle, torch distance and angle, shield and seal photos from several angles, the dates of the symptom and any recent changes, and, if available, the removed bearing. Our products carry a 12 month warranty from the date of shipment; a claim is assessed against these records and the actual operating conditions, so contamination evidence and installation notes matter as much as the part itself.
If you are replacing a worn wrist or joint bearing, or specifying a new one, send us your drawings and a few photos of the seal area. We will review the sealing and mounting arrangement with you and, once you get a quote, recommend suitable BY Bearings options.
 +8618939019135
 sales@bybearings.com
 +8618939019135