BRA Series Bearings: A Guide to High Torque After Preload
You have installed a set of BRA Series Crossed Roller Bearings into your precision rotary equipment, followed the procedure to apply preload for maximum rigidity, and then discovered a problem: the rotational torque is unexpectedly high. The drive motor may be straining, the system may be generating excess heat, or the motion is no longer smooth. This is a common challenge in applications demanding high stiffness, from robotics to CNC rotary tables.
As a specialist in Precision Crossed Roller Bearings for over 15 years, I've seen this scenario many times. The issue almost always stems from a misunderstanding of the delicate balance between preload, mounting accuracy, and the bearing's internal geometry. BRA series bearings are designed with a very thin outer ring, making them exceptionally sensitive to mounting conditions. While our manufacturing process, governed by a strict ISO 9001 quality system, ensures every bearing meets its specifications, external factors during installation are the primary cause of post-assembly torque issues.
This article provides a methodical, diagnostic approach to identify the root cause of high torque in your assembly and outlines corrective actions to achieve both high rigidity and smooth, low-torque rotation.
Initial Diagnostic Checks for High Rotational Torque
Before disassembling the entire unit, perform these non-invasive preliminary checks. These steps can often pinpoint the problem without requiring a complete teardown, saving valuable time. Systematically work through this list to gather data on the operating conditions.
Common Installation Issues Checklist:
Review the Preload Application: How were the mounting bolts tightened? A common error is tightening bolts unevenly or without a calibrated torque wrench. This can easily distort the thin outer ring of a BRA series bearing, creating internal binding that dramatically increases friction. Always use a star or crisscross pattern and apply torque in multiple, incremental stages.
Verify Mounting Surface Cleanliness: During assembly, were the bearing, housing bore, and shaft shoulder perfectly clean? Even a small metal chip, a piece of grit, or a burr on a mounting surface can create a high spot. This localized pressure point will deform the bearing ring when clamped, leading to high rotational torque issues.
Measure Operating Temperature: Use an infrared thermometer to monitor the bearing's housing temperature during operation. A rapid or significant temperature rise (e.g., more than 20-30°C above ambient) is a clear indicator of excessive friction. This suggests that the preload is too high or there is another mechanical issue causing binding.
Confirm Lubricant Specification: Check the assembly records. Was the specified lubricant used? Using a grease with a higher viscosity or a different base oil than recommended can increase running torque, especially in low-temperature or high-speed applications. Ensure the correct quantity was applied; over-greasing can also contribute to a minor increase in torque.
If these initial checks do not resolve the issue, the problem likely lies in the fundamental relationship between the applied preload and the mechanical limits of the assembly. The next step is to understand this boundary.
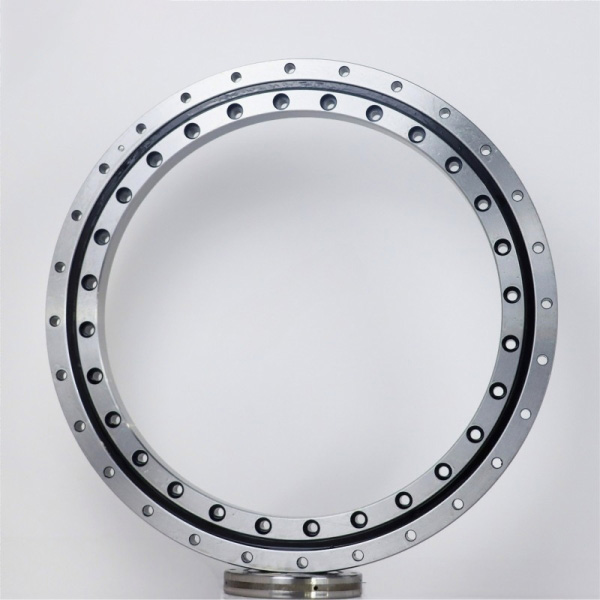
The Preload Boundary: Rigidity vs. Excessive Torque and Heat
Preload is a compressive force intentionally applied to a bearing to eliminate internal clearance. For crossed roller bearings, this "negative clearance" is what delivers exceptional stiffness and positioning accuracy. However, there is a critical boundary. Once the preload becomes excessive, its benefits are quickly outweighed by destructive side effects like high friction, heat, and premature failure.
Understanding where this boundary lies for your specific application is key. The goal is to apply just enough preload to achieve the target rigidity without creating unnecessary friction. This balance is influenced by the precision of your mounting components, the operating speed, and the external loads.
The following table outlines the symptoms of an optimally preloaded system versus one with excessive preload.
| Condition / Symptom | Optimal Preload (Correct Negative Clearance) | Excessive Preload (High Negative Clearance) |
|---|---|---|
| System Rigidity | High and stable. Deflection under load is minimal and predictable. | Extremely high initially, but may become unstable due to thermal expansion or ring distortion. |
| Rotational Torque | Smooth, consistent, and within the catalog's specified range for the bearing. | High starting torque ("stiction") and running torque. Rotation may feel "notchy," tight, or inconsistent. |
| Heat Generation | Minimal and stable temperature rise during operation. | Rapid and continuous temperature increase, potentially leading to lubricant degradation and thermal runaway. |
| Positioning Accuracy | Excellent. Enables micro-radian positioning with high repeatability. | Compromised by thermal drift. High friction can cause "stick-slip" motion, ruining fine positioning control. |
| Acoustic Noise | Quiet, smooth operational sound. | Noticeably louder operation, which may include humming, whining, or grinding sounds. |
| Bearing Service Life | Maximized according to L10 life calculations based on load and speed. | Drastically reduced due to high internal stress on raceways, accelerated lubricant breakdown, and heat damage. |
Troubleshooting Preload Issues Step-by-Step
If your initial checks and understanding of the preload boundary point towards an installation issue, this systematic procedure will help you isolate and correct the root cause. This process requires careful, methodical work.
Step 1: Quantify the Rotational Torque
Before making adjustments, establish a baseline. If possible, use a dial or digital torque wrench to measure the starting and running torque of the assembly. Compare this measurement to the specification sheet for your specific BRA series bearing. If your measured torque is significantly higher (e.g., 50% or more) than the specified value, it confirms a mechanical issue.
Step 2: Isolate the Cause with Systematic Loosening
This step helps determine if the high torque is caused by excessive clamping force or a more fundamental geometry issue.
Mark the Bolt Positions: Before you begin, mark the current orientation of each mounting bolt.
Loosen Incrementally: Using a torque wrench, loosen each bolt in the reverse of the tightening sequence (star pattern) by a small, uniform increment, such as 1/8th of a turn.
Measure Torque After Each Increment: After each incremental loosening step, rotate the bearing and measure the running torque again.
Analyze the Results:
Scenario A: Torque Drops Significantly. If the rotational torque falls back into the expected range after a small loosening adjustment, the root cause was excessive or uneven preload from the bolts. The fix is to re-tighten the bolts correctly, using a calibrated torque wrench and following a multi-stage star pattern to reach the specified torque value.
Scenario B: Torque Remains High. If the torque is still high even after the bolts are significantly loosened, the problem is not the clamping force itself. Instead, it is likely caused by distortion from out-of-spec mounting surfaces or contamination. Proceed to the next step.
Step 3: Disassemble and Inspect Mating Components
If loosening the bolts did not solve the problem, a full disassembly and inspection are required.
Inspect for Contamination: Carefully clean and inspect the housing bore, shaft shoulder, and clamping flanges. Look for any burrs, nicks, or embedded debris that could create a high spot.
Verify Mounting Geometry: Use precision measurement tools (e.g., a coordinate measuring machine or dial indicators) to check the flatness and parallelism of the housing and shaft mounting surfaces. For our high-precision P4 and P2 grade Rotary Table Bearings, we require exceptional mounting accuracy. A surface that is out-of-flat by even a few micrometers can deform the bearing and cause binding. Our bearings are manufactured with runout controlled within 1.5 μm; your mounting surfaces must match this level of precision to achieve optimal performance.
Check the Bearing: Inspect the bearing rings for any signs of damage, scuffing, or deformation that may have occurred during the initial installation. If the ring is permanently deformed, the bearing must be replaced.
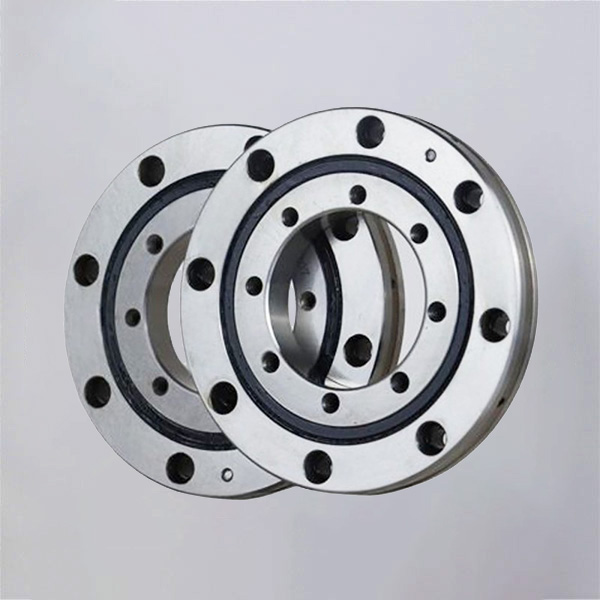
Common Mistakes in BRA Series Bearing Installation to Avoid
Many high-torque issues can be prevented by avoiding these common installation errors. As a manufacturer supporting clients in over 65 countries, we have seen how attention to detail during assembly is the most important factor for success.
Not Using a Torque Wrench: "Feel" is not a precise measurement. The thin-walled structure of BRA bearings requires the clamping force to be both correct and evenly distributed. A calibrated torque wrench is not optional; it is a requirement.
Ignoring Surface Finish and Flatness: Mounting a P4 or P2 precision bearing on a surface that is not finished to an equivalent level of accuracy will negate the bearing's precision. Always verify that your mating components meet the geometric tolerance recommendations in the bearing catalog.
Applying Force Incorrectly: Never press-fit or strike a bearing to seat it. Force should only be applied evenly to the ring being fitted (e.g., the inner ring for a shaft fit). Applying force across the rolling elements can cause permanent dents in the raceways (brinelling), leading to noise and high torque.
Reusing Single-Use Fasteners: If the mounting design uses torque-to-yield bolts, they should never be reused. They will not provide the correct clamping force when re-tightened, leading to unpredictable preload.
Improper Handling and Storage: Leaving bearings exposed in a non-controlled environment can lead to contamination or corrosion before they are even installed. Keep them in their original packaging until the moment of installation.
By following a methodical diagnostic process and paying close attention to the details of installation, you can successfully resolve high-torque issues. The result will be a system that leverages the full potential of BRA series crossed roller bearings: outstanding rigidity combined with smooth, efficient rotation.
If you have followed these steps and still face challenges with high torque or other performance issues, our engineering team is available for consultation. Submit your application details and we can help analyze the problem and recommend a solution. Contact us to get a quote or a technical review of your design.
 +8618939019135
 sales@bybearings.com
 +8618939019135