How to Set Preload for BRT Rotary Table Bearings
Incorrect preload is a primary cause of poor performance and premature failure in high-precision rotary axes. For engineers commissioning a CNC rotary table or turn-mill center, achieving the correct preload on BRT Rotary Table Bearings is not just a final assembly step; it is fundamental to the machine's overall accuracy and service life. A bearing that is too loose will cause chatter and positioning errors, while one that is too tight will overheat and fail quickly. This guide provides a direct, actionable procedure for setting and verifying the correct preload, ensuring your equipment performs to its specified P4/P2 precision levels.
As a specialist with over 15 years in precision bearing manufacturing, I've seen firsthand how proper installation unlocks a bearing's full potential. The process requires attention to detail, the right tools, and an understanding of how preload affects bearing stiffness and rotational torque. Following these steps will help you avoid common installation pitfalls and achieve stable, long-term performance.
Prerequisites and Tools for Preload Adjustment
Before you begin the mounting process, a systematic preparation ensures a smooth and accurate installation. Attempting to set preload without the right tools or on unprepared surfaces will compromise the final result, regardless of the bearing's quality. Use the following checklist to confirm you are ready.
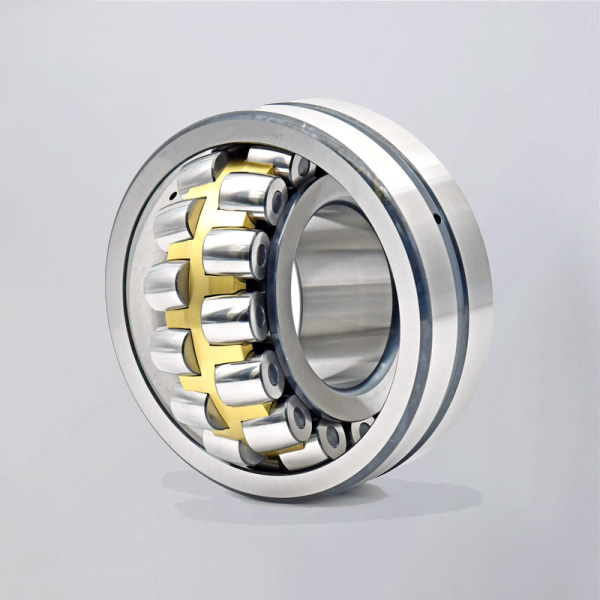
Pre-Installation Checklist
Required Tools:
Calibrated Torque Wrench: Essential for applying even and accurate clamping force. An uncalibrated wrench is a primary source of error.
Dial Indicator & Magnetic Base: For measuring axial and radial runout after installation to verify seating.
Feeler Gauges: To check for gaps between mating components if runout is detected.
Lint-Free Cloths & Solvent: For cleaning all mounting surfaces and the bearing itself. Contamination is a direct cause of failure.
Technical Documentation:
Machine Assembly Drawings: To confirm the correct orientation and location of all components.
Bearing Specification Sheet: Provides critical data, including recommended mounting bolt torque values and acceptable starting torque range. Our OEM services can provide custom data for unique applications.
Component & Environment Inspection:
Clean Environment: Assemble the bearing in a clean, low-dust area to prevent contaminants from entering the raceways.
Surface Verification: Inspect the shaft and housing mounting surfaces. They must be clean, flat, and free of burrs or scratches. The quality of these surfaces should match the bearing's precision. At BY Bearings, our Quality Control process ensures runout is controlled within 1.5 μm; your mounting surface must be equally precise to maintain this accuracy.
Material Confirmation: Our bearings are made from premium GCr15 (SAE 52100) BY Bearings, which requires stable, high-quality housing and shaft materials to perform correctly.
The Role of Preload in High Precision Applications
Preload is a calibrated axial force applied to a bearing during installation to eliminate the internal clearance between the rollers and raceways. This adjustment is what gives a rotary axis its high stiffness and rotational accuracy. Without correct preload, the bearing cannot effectively resist the radial, axial, and moment loads generated during machining, leading to deflection and vibration. However, the goal is to find the delicate balance between stiffness and friction. Understanding the effects of different preload levels is key to achieving this balance.
The following points explain how preload adjustment directly impacts performance, preventing vibration without introducing excessive starting torque or heat.
Optimal Preload (The Target Zone):
Action: A precise clamping force is applied, slightly compressing the rolling elements against the raceways to remove all free play.
Result: This creates a rigid system where the bearing assembly acts as a solid component. It maximizes stiffness, preventing micro-movements that cause chatter and ensuring the spindle or table rotates on its intended axis with high accuracy.
Benefit: The bearing runs smoothly with a low, stable starting torque and minimal heat generation. This is the ideal state for long service life and is essential for achieving the P4/P2 precision required in applications like the gear grinding machines used by our customer in Mexico.
Insufficient Preload (Too Loose):
Action: The mounting bolts are not tight enough, leaving residual clearance inside the bearing.
Result: Under load, the rollers can shift or skid instead of rolling purely. This causes vibration, audible noise, and unpredictable rotational movement, directly leading to poor surface finishes and dimensional inaccuracies in machined parts.
Consequence: Leads to accelerated wear, raceway damage (brinelling), and a drastic reduction in the bearing's operational life.
Excessive Preload (Too Tight):
Action: The clamping force is too high, severely over-compressing the rollers and raceways.
Result: Internal friction increases dramatically. This manifests as high starting torque, which can strain drive motors, and a rapid rise in operating temperature.
Consequence: The excessive heat degrades the lubricant, leading to metal-to-metal contact. This causes rapid, catastrophic failure through plastic deformation and seizure of the bearing.
Step-by-Step Procedure for Setting Preload
This procedure outlines the systematic process for tightening the mounting bolts to achieve a uniform and correct preload. The key is a multi-stage approach in a star pattern to ensure the bearing rings are not distorted.
Clean and Prepare Surfaces: Thoroughly clean the bearing’s mounting surfaces, the housing flange, and the shaft. Remove any protective oils and ensure all mating parts are completely dry and free of debris.
Position the Bearing: Carefully place the bearing onto its mounting surface. Ensure it is perfectly flat and aligned with the mounting holes. Do not force it into place; it should seat smoothly.
Hand-Tighten Bolts: Insert all mounting bolts and tighten them by hand until they are snug. This ensures the bearing is evenly held in place before applying torque.
Apply Torque in Stages (Star Pattern): Using a calibrated torque wrench, tighten the bolts in a star or crisscross pattern to distribute the clamping force evenly. Never tighten adjacent bolts consecutively.
Pass 1: 30% Torque. Tighten each bolt to approximately 30% of the final recommended torque value, following the star pattern.
Pass 2: 60% Torque. Repeat the pattern, increasing the torque on each bolt to 60% of the final value.
Pass 3: 100% Torque. Repeat the pattern a final time, bringing each bolt to 100% of the specified torque.
Seat the Rolling Elements: After the final torque pass, slowly rotate the bearing or the rotary table through at least 5-10 full revolutions. Do this in both clockwise and counter-clockwise directions. This action settles the rollers into their final loaded position on the raceways, which can slightly relax the initial preload.
Final Torque Verification: After rotating the bearing, go over all bolts one last time in the star pattern, ensuring they are all at 100% of the final torque value. It is common for some bolts to require a slight additional turn to get back to the target torque after the components have settled.
This methodical process is vital for all high-stiffness bearings, including our popular Crossed Tapered Roller Bearings, to ensure they deliver their rated performance.
Verifying Correct Preload and Common Mistakes to Avoid
Once the bolts are tightened, you must verify that the preload is within the specified range. Relying solely on torque wrench settings is not enough; a final check confirms the bearing's mechanical state.
Verification Methods
Measure Starting Torque: This is the most direct and reliable verification method. Attach a torque wrench to the rotary table's drive or a suitable fixture on the bearing's rotating ring. Measure the torque required to *start* the rotation from a standstill. This value should fall within the range specified on the bearing's data sheet. If it is too high, the preload is excessive; if too low, the preload is insufficient.
Check Rotational Smoothness: As you rotate the bearing, it should feel consistently smooth with a slight resistance. Any grittiness, catching, or intermittent tight spots indicate a problem, such as contamination or a distorted bearing ring.
Measure Runout: Mount a dial indicator on a fixed part of the machine with the tip contacting the face (for axial runout) or the bore/outer diameter (for radial runout) of the rotating ring. As you rotate the bearing, the indicator should show a value within the bearing's precision grade tolerance (e.g., P4 or P2). Since BY Bearings performs 100% inspection to guarantee runout is within 1.5 μm before shipment, any excessive runout after installation points directly to a mounting issue.
Common Installation Mistakes and How to Fix Them
Even experienced technicians can make mistakes. Recognizing them quickly can prevent costly damage and downtime. Here are the most frequent errors we see in the field for Bearings for Machine Tools.
| Mistake | Symptom | Solution |
|---|---|---|
| Uneven or Incorrect Tightening Sequence | High runout; inconsistent rotational torque (tight and loose spots). | Loosen all bolts completely. Re-start the mounting process, strictly following the multi-stage, star-pattern tightening procedure. |
| Contamination on Mating Surfaces | Bearing does not sit flat; high runout reading that is repeatable at the same spot; gritty or noisy rotation. | Disassemble the unit. Thoroughly clean the bearing, housing, and shaft again with a proper solvent. Inspect all surfaces for hidden burrs or damage before reassembling. |
| Skipping the "Settling" Rotation | Preload feels correct initially but loosens after a few hours of operation, leading to increased vibration. | Loosen the bolts to ~60% of the final torque. Perform the 5-10 full rotations to seat the rollers. Then, re-torque all bolts to 100% in the star pattern. |
| Using a Non-Calibrated Torque Wrench | Bearing fails prematurely due to overheating (over-torqued) or develops chatter (under-torqued), even though the "correct" value was set. | Invest in and regularly calibrate your torque tools. If you suspect an issue, use a known, calibrated wrench to check the existing bolts and re-torque as needed. |
Properly setting the preload is a skill that directly translates into machine performance and reliability. By following these steps and verification checks, you ensure that your equipment leverages the full precision of its components.
If you require specific torque values for your application or need assistance with a custom precision bearing design, please send us your technical drawings and our engineering team will be happy to help. You can get a quote for your project today.
 +8618939019135
 sales@bybearings.com
 +8618939019135