Prevent Roller Skew in Crossed Roller Bearings
Why Does a Crossed Roller Bearing Bind After Installation?
The bearing turned freely on the bench. After you bolted it into the joint or table, it drags, pulses, or feels gritty. Is the bearing at fault, or is the surrounding structure forcing it out of shape?
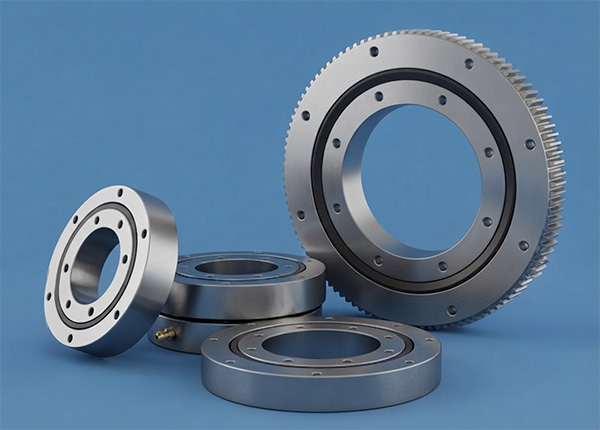
In most post-installation complaints we see, the second explanation deserves the first look. Precision crossed roller bearings place cylindrical rollers alternately at 90° in a single V-groove. Each roller works properly only while its axis stays square to the raceway. If a ring is pushed out of round or out of plane, some rollers tilt and slide instead of rolling. That is roller skew. The result is higher friction, uneven torque and, if you keep running it, marked raceways.
Before any diagnosis, separate what you see from what you suspect:
- Observed symptom: torque is higher than expected, varies around the rotation, or the bearing feels rough.
- Suspected causes: mounting-face error, ring distortion, contamination, handling damage, or a design preload that was never accounted for.
- Confirmed finding: only what a measurement or a controlled test (such as loosening the bolts) has actually shown.
Stop conditions: do not power the drive if the bearing cannot be turned by hand, if torque climbs steadily while you tighten bolts, or if you hear grinding or find metal debris. Running through skew can damage the raceway and turn a mounting problem into a replacement.
Preliminary Checks You Can Do Before Dismantling
These checks need only a clean bench, a dial indicator, and a torque reading method such as a spring scale or a torque screwdriver. Work through them in order.
- Record the symptom precisely. Note when it appeared (after bolt-up, after warm-up, after a shock load), whether torque is high all round or only at certain angles, and whether the noise is steady or cyclic.
- List recent changes. New housing, re-machined face, different bolts, a changed shim, a repaired shaft, or a bearing that was removed and refitted.
- Check the part and its markings. Confirm the series, accuracy class and any ring orientation or pairing marks against the drawing. For a split-ring design, make sure the halves belong together and face the right way.
- Inspect the mating faces by eye. Look for burrs, paint, dirt, old sealant, fretting marks, or a bright, uneven contact pattern.
- Run the loosening test. Back off the mounting bolts and turn the bearing by hand. If torque drops noticeably, the load comes from the structure, not from the bearing itself. If torque stays high and rough, move on to the contamination or damage branch.
How Flatness Errors, Ring Distortion and Handling Create Roller Skew, Torque Variation and Rough Rotation
Crossed roller bearing mounting error usually does not look dramatic. A face that is slightly off or a bolt pattern tightened unevenly is enough, because the bearing's thin sections follow whatever shape the mating parts give them. The table links each cause to what it does inside the bearing and what you will observe.
| Cause | What happens inside the bearing | What you observe |
|---|---|---|
| Uneven mounting-face flatness | The ring is pulled into a wavy or dished shape when bolted. The raceway angle changes locally and some rollers tilt. | Torque rises as bolts are tightened, with a repeating high spot at the same angular position each turn. |
| Mating face not square to the bore | The ring tilts, so the load is carried unevenly across the roller set. | Torque differs when you measure at several angular positions, and one side of the ring runs warmer. |
| Housing bore out of round or shaft fit too tight | The ring is squeezed into an oval shape and the effective clearance turns into extra preload in two zones. | Two torque peaks per revolution, often with a tight feel that worsens after warm-up. |
| Uneven bolt or pressing-ring tightening | The clamp load deforms the ring, with the tightest bolt area becoming a local pinch point. | Torque jumps after the last bolts are tightened and changes when bolts are re-tightened in a different order. |
| Dirt or burrs under the ring | A small lump acts as a point support and lifts or bends the ring around it. | A sharp, localized torque spike or a gritty feel at one position. |
| Impact, tilted press-in, or a dropped bearing | Raceway or roller damage, or a permanently deformed ring. | Rough rotation that stays after the bolts are loosened, with noise that does not follow the mounting pattern. |
These are tendencies, not guarantees. A bearing supplied with specified negative clearance (preload) will turn with more resistance than a clearance-fit bearing even when mounted perfectly, so compare your reading with the drawing or catalogue torque for that series before you declare a fault.
It also helps to know where the bearing started. Our quality control process includes 100% inspection before shipment, with runout controlled within 1.5 μm. A bearing that turns smoothly on the bench but binds in the machine therefore points first to the mounting conditions. That is where to look first, not a confirmed verdict.
Diagnostic Order: Observation, Likely Meaning, Next Action
Use the pattern of the torque, not just its size, to decide what to check next. Measure at four or more angular positions and write the values down.
| Observation | Possible meaning | Next action |
|---|---|---|
| Torque drops clearly when bolts are loosened | Mounting stress or ring distortion | Check face flatness and squareness with a dial indicator, then bore roundness. |
| One torque peak per revolution at a fixed angle | Local high spot, debris, or one over-tightened bolt zone | Mark the angle, remove the bearing, and inspect that zone of the mating faces. |
| Two peaks per revolution | Oval housing bore or oval shaft seat | Measure the fit diameters at several angles and compare with the drawing fit. |
| Torque rises with temperature | Excess preload from tight fits or thermal growth of the structure | Review fits and the housing material. Confirm whether the bearing's preload was specified. |
| Gritty feel with no angular pattern | Contamination or raceway damage | Inspect the lubricant and raceway. If damage is visible, stop and escalate. |
| Torque stays high with bolts fully loosened | Handling damage, wrong ring orientation, or an unsuitable pairing | Check markings and handling history. Stop and send details to support. |
If the drawing gives no flatness or squareness requirement for the seat, you need that reference before any measurement means much. Ask your design team, or send us the drawing and we can advise on the series being used.
Corrective Action and How to Verify the Fix
Match the fix to the evidence. Re-machining a housing because of a gritty feel, or replacing a bearing that only needs its bolts re-tightened in sequence, wastes time.
- Clean and deburr. Remove the bearing, wipe both mating faces, and break any sharp edges at the bore and corners.
- Measure the seat. Check flatness and squareness against the drawing with a dial indicator. Record the high and low points.
- Correct the seat if needed. Stone or re-grind a local high spot, or re-machine the face, depending on how large the deviation is.
- Refit gently. Seat the bearing evenly with no hammering on the rings. Do not twist or tilt it into the bore.
- Tighten in stages. Use a cross pattern and several passes, turning the bearing by hand after each pass. If torque climbs step by step, stop and go back to the measurements.
- Verify the result. Re-measure torque at the same angular positions you recorded earlier. Check that the peak has gone or shrunk, and repeat after a short warm-up run.
Illustrative scenario (not a customer record): a rotary joint turns freely when the bolts are loose, but torque doubles on the final tightening pass and pulses once per revolution. A dial indicator shows a raised patch on the housing face near one bolt hole. After the patch is stoned flat and the bolts are re-tightened in stages, the pulse disappears. The same torque reading at four positions now confirms the cause. If the pulse had stayed, ring damage or contamination would remain open explanations.
Precision level matters too. We supply P2 rotary table bearings for gear grinding in Mexico, and we supply crossed roller bearings for semiconductor equipment in Germany. In applications like these, torque ripple shows up directly in surface finish or positioning, so a mounting error that a general-purpose joint might tolerate becomes visible much sooner.
Common Mounting Mistakes That Lead to Skew
- Tightening bolts one after another around the circle. This drags the ring into a spiral. Use a cross pattern in stages.
- Hammering the ring to seat it. Even light impacts can mark raceways. Use an even press or a soft-faced tool on the full ring face.
- Reusing a seat without cleaning it. One burr or flake of sealant can bend a thin ring.
- Assuming a tighter fit is safer. Interference beyond the drawing converts clearance into preload and raises torque and heat.
- Ignoring ring markings or pairing. Swapped halves or reversed orientation can leave the rollers unsupported.
- Judging torque only once. A single reading hides cyclic peaks. Measure at several positions and after warm-up.
Some cases are not mounting errors at all. If the loads include heavy overturning moment, a different bearing type may suit the joint better. Our BXR/BJXR crossed tapered roller bearings are one option for that case. Even then, the same flatness and fit controls apply.
Prevention Checks and When to Escalate
To avoid a repeat, build these checks into the assembly instruction rather than leaving them to individual habit:
- Record face flatness, squareness and bore roundness for each housing before the first bearing is fitted.
- Define a bolt tightening sequence and number of passes, and keep torque values on the work card.
- Log the free-turn torque before and after final tightening, so any increase from the mounting stage is visible.
- Keep bearings in their packaging until fitting and mark ring orientation on the housing.
Escalate when the bearing still binds with bolts fully loosened, when raceway damage or debris is visible, or when the torque pattern does not match any branch above. For support, send the part number and series, the drawing of the seat, your torque readings at several angles (before and after bolting), the tightening sequence used, and photos of the mating faces and the bearing. Our bearings carry a 12-month warranty from the date of shipment. We assess each case on those records, and a mounting-induced issue is handled separately from a manufacturing one.
If you are planning a new assembly with BRE series crossed roller bearings or another series, share your drawing and symptoms and we will review the mounting conditions with you. You can get a quote or ask for selection advice through our contact page.
 +8618939019135
 sales@bybearings.com
 +8618939019135