Prevent Runout in Rotary Table Bearings: Diagnosis Guide
Your indexing table misses its position by a few microns, or the finish on a ground gear shows a repeating pattern. Is the bearing worn out, or is something around it distorting a perfectly good part? In our experience, the second explanation is correct more often than people expect. Runout in rotary table bearings usually comes from three installed conditions: a poor mounting surface, wrong preload, or contamination. This article gives you the order in which to check them and what each symptom points to.
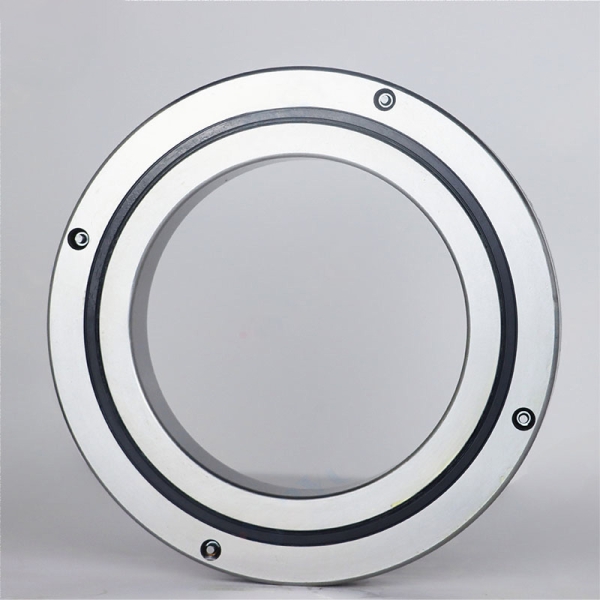
Bearing Runout vs. Installed Runout: Know Which One You Are Chasing
A bearing leaves the factory with a measured runout. At BY Bearings, runout is controlled within 1.5 μm, and every bearing gets 100% inspection before shipment. That figure describes the bearing on an inspection fixture. It does not describe the bearing once it is bolted into your machine.
Once you clamp a thin, precision ring against a housing, the ring takes the shape of whatever it is clamped to. A bearing that measured within spec can read several times worse after assembly. So the first judgment call is simple:
If runout appears immediately after assembly, suspect mounting surfaces or bolt sequence.
If runout grew gradually over weeks or months, suspect contamination, lubricant breakdown, or preload loss.
If runout is present even on a bare bearing on a clean granite plate, contact the supplier. That is a bearing issue, and our 12 month warranty from the shipment date applies.
Limit: this logic assumes the bearing precision class matches the job. A P5 bearing will not hold what a P4 or P2 bearing is designed to hold, and no amount of careful mounting fixes a wrong grade.
Diagnosing Runout: Mounting Errors, Preload, and Contamination
Work through the causes in the order below. The order runs from the cheapest, fastest check to the one that needs disassembly. Do not skip ahead to replacing the bearing.
| Check order | Suspected cause | What you see | What it points to | Correction |
|---|---|---|---|---|
| 1 | Mounting surface error | Runout changes when you loosen or re-tighten the bolts. Pattern repeats twice per revolution (oval) or once per revolution (eccentric). | Seating face not flat or not square, burrs, or bore concentricity error. Uneven bolt tightening. | Re-machine or re-grind the seating faces. Remove burrs. Re-tighten bolts in a cross pattern and in stages. |
| 2 | Preload (too high) | Rotation torque is lumpy or rises as the table warms. Runout looks stable cold but drifts when hot. | Excess interference from tight housing or shaft fits, or over-tightened clamp rings. | Check fits against the catalog. Reduce clamping force to the specified level. Re-check torque cold and warm. |
| 3 | Preload (too low) | Table tilts or rocks under cutting load. Position error depends on load direction, not rotation angle. | Residual clearance, loose clamping, or worn raceways. | Confirm clamping force. If clearance persists after correct assembly, replace the bearing with a preloaded type. |
| 4 | Contamination | Irregular spikes in the indicator reading that do not repeat. Gritty feel, noise, or dark lubricant. | Chips, coolant ingress, or debris trapped between ring and seating face. Or debris inside the bearing. | Clean seating faces and inspect seals. Flush and relubricate if the raceway is undamaged. Replace if raceways are marked. |
Reading the pattern on the indicator
Record the reading every 30 degrees or so and plot it. A smooth sine wave with one cycle per turn usually means eccentric mounting. Two cycles per turn point to an oval distortion, often from a seating face that is not flat or from bolts tightened unevenly. Random jumps rarely come from geometry. They come from a particle.
Where this logic does not apply
If the table has an integrated motor or a direct drive, motor magnetic pull can mimic preload problems. Run the bearing unpowered first. Also, if the machine took a crash, check for raceway damage before spending time on mounting surfaces.
Step by Step: Isolating the Cause on the Machine
Measure first, touch nothing. Mount the dial indicator on a fixed base. Record radial runout at the bore or outer diameter and axial runout on the table face. Note the angle of the maximum reading.
Loosen the mounting bolts slightly and re-measure. If the reading changes significantly, the mounting surface or the clamp is distorting the ring.
Rotate by hand and feel the torque. Uneven torque suggests preload or debris. Smooth, light torque with high runout suggests geometry.
Remove the bearing and inspect both seating faces. Look for burrs, dents, chips, and dried coolant. Wipe with a clean lint-free cloth and check for dark residue.
Check the faces against a flat reference. A gap under a straightedge or a high spot found with marking compound means the face needs re-machining.
Re-install clean. Seat the bearing, tighten bolts gradually in a cross pattern, and measure after each stage. Stop when the reading no longer improves.
Test under load. Static runout can look fine while the table tilts under cutting forces. Repeat the measurement with a representative load on the table.
Common Mistakes That Create Runout After a Good Bearing Is Fitted
Tightening bolts one after another around the circle. This pulls the ring out of round. Use a cross pattern and several stages.
Reusing a damaged seating face. A small dent from a past tool strike can lift the ring locally. Re-machine it.
Assuming more preload means more accuracy. Too much raises friction torque and heat, and thermal drift then shows up as positioning error. This matters most in Bearings for DD Motors, where low friction torque is the goal.
Machining the housing and the shaft separately without a reference. Concentricity between the two seats is as important as each seat's flatness.
Opening the packaging on the shop floor. Keep the bearing sealed until the housing is clean. Coolant mist and fine chips travel further than expected.
Blaming the supplier first. Measure on a clean reference before sending a bearing back. It saves both sides weeks.
When the Cause Is the Bearing Choice: Matching Type to Load
Sometimes the mounting is right and runout still appears under load. That points to a bearing that does not suit the combined radial, axial, and overturning moment loads. The table below summarizes where each type fits.
| Bearing type | Best fit | Limit |
|---|---|---|
| Precision Crossed Roller Bearings | Compact joints, robotics, and light to medium tables where space and weight matter | Less overturning stiffness than larger table bearings under heavy cutting loads |
| BRT Rotary Table Bearings | CNC rotary tables and turn-mill centers with combined loads and tight indexing requirements | Needs well-prepared, flat seating faces and correct clamping to reach rated accuracy |
| Crossed Tapered Roller Bearings | High tilting stiffness under heavy multi-axis dynamic loads | Higher friction torque than a crossed roller design, so less suited to very low-torque drives |
For machine tool applications, see our page on Bearings for Machine Tools. The wider range of Rotary Table Bearings includes standard and customized dimensions. If your design uses special mounting holes or outer dimensions, OEM customization is available.
A Real Example and What We Control on Our Side
One case from our export work shows the point. A customer in Mexico used P2 rotary table bearings for gear grinding, where a runout error shows directly on the tooth profile. In that kind of job the bearing class sets the ceiling, and installation determines whether you reach it. We also supplied crossed roller bearings to a German semiconductor equipment customer, where micro-vibration and positioning stability drive the specification.
On our side, we control what we can: P5, P4, and P2 grinding grades, GCr15 (SAE 52100) steel verified by spectrographic analysis, and metallographic checks after heat treatment to confirm hardness of HRC 60-64 and a stable martensitic structure. Our ISO 9001 quality system and Quality Control process end with 100% inspection before shipment. The factory covers 13,500 m² with 15,000 sets of monthly capacity, and 15+ years of precision bearing experience sit behind the process.
Buyer's checklist before you order or re-order
Required runout and precision class (P5, P4, or P2) for the finished process.
Load case: radial, axial, and overturning moment values at peak cutting or acceleration.
Housing and shaft seat flatness and concentricity, measured, not assumed.
Specified clamping method and bolt count, so the ring is not distorted.
Sealing and coolant exposure in the machine.
Interchangeability needs. Our designs offer dimensional and functional interchangeability with major international brands, with a quoted turnaround of 3 to 6 weeks for OEM supply.
If you are tracing an indexing error now, send us your measurement pattern, bearing model, and housing drawing. Our team can advise whether the cause looks like mounting, preload, or contamination, and whether a different bearing type is worth considering. You can get a quote or request selection advice through our contact page.
 +8618939019135
 sales@bybearings.com
 +8618939019135