RE Series Crossed Roller Bearings for Rotary Axes
Which RE configuration will actually hold a rotary axis to its positioning target once the machine is loaded, warm, and running? Catalog dimensions will not answer that. Ring rotation, mounting orientation, preload, and the runout you must hold decide the answer. RE Series Crossed Roller Bearings suit compact rotary axes well, but only when those four inputs are settled before the drawing is released. BY Bearings builds the full range of Precision Crossed Roller Bearings, and this guide shows machine builders how to check fit before finalizing a design.
Where RE Bearings Fit on a Rotary Axis, and Where They Do Not
A crossed roller bearing places cylindrical rollers at 90° to each other between the rings. One thin bearing therefore carries radial load, axial load, and overturning moment together. That is why rotary tables, indexing heads, and robot joints use it in place of a pair of angular contact bearings.
The RE type has an integral outer ring and a split inner ring. Check this against the drawing of the series you intend to use. It affects how the bearing is clamped and which ring should rotate.
Good fit: compact indexing tables, fourth and fifth axis trunnions with moderate cutting load, and positioning stages where section height is limited.
Reasoning: the roller line contact gives high stiffness for its section, and a preloaded bearing removes the play that causes positioning drift.
Limit: heavy interrupted cutting with large overturning moments may need a larger bearing, or a different type such as Crossed Tapered Roller Bearings or Rotary Table Bearings. Send us the load case and we will tell you plainly if an RE bearing is the wrong choice.
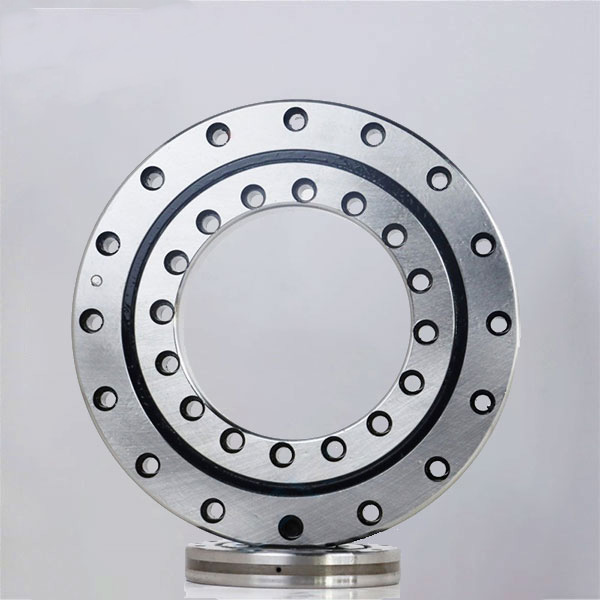
How Ring Rotation, Mounting Orientation, Preload, and Runout Determine the RE Configuration
Treat these four inputs as a sequence. Each one narrows the options for the next, and each has a typical way of going wrong. The table summarizes the logic. The steps below it give the checkpoints.
| Input | What to confirm | Configuration consequence | Typical failure if skipped |
|---|---|---|---|
| Ring rotation | Inner ring rotating or outer ring rotating; stationary ring identified | Decides which ring is clamped, and where the split inner ring joint and clamping hardware sit | Uneven clamping, ring creep, local wear on the stationary ring |
| Mounting orientation | Horizontal, vertical, or tilted axis; direction of main axial and moment load | Decides shoulder design, housing stiffness, and which side takes the retaining plate | Load path through a thin flange, deformation, raceway distortion |
| Preload | Required stiffness versus friction torque and heat limit | Decides clearance class: light negative clearance for stiffness, or near zero for low torque | Too tight: torque rise and thermal drift. Too loose: wobble and poor repeatability |
| Required runout | Axis accuracy target and the precision grade it implies | Decides P5, P4, or P2 grade and the tolerance of mating parts | Good bearing, poor housing: the specified accuracy is never reached |
Step 1: Fix which ring rotates
Action: mark the rotating and stationary ring on your assembly drawing.
Checkpoint: the split inner ring halves must be held flush by the clamping plate or shoulder. Confirm the clamp acts evenly around the full circumference.
Common failure: bolt spacing too wide on the clamp plate, so the ring seats unevenly and shows up as a once per revolution error.
Step 2: Set mounting orientation and load path
Action: list the axial load, radial load, and overturning moment, and say which direction each acts.
Checkpoint: the load should pass through a supported shoulder, not through a thin cover. On a vertical axis, the weight of the table adds permanent axial load.
Common failure: sizing for static weight only and ignoring cutting or acceleration moments.
Step 3: Choose preload deliberately
Action: decide the stiffness you need, then the friction torque your motor and thermal budget allow.
Checkpoint: for high accuracy axes, a light negative clearance is the usual starting point because it removes wobble without a large torque penalty. Direct drive axes with tight torque limits may need a lower preload and a low friction lubricant.
Common failure: assuming more preload always means more accuracy. Past a point, heat growth moves the axis more than the lost play ever did.
Step 4: Tie runout to grade and housing tolerance
Action: convert your positioning target into a bearing precision grade (P5, P4, or P2).
Checkpoint: the bearing seat roundness, shoulder squareness, and flatness must match the grade. A P2 bearing in a loosely machined housing will not perform like P2.
Common failure: specifying the grade on the bearing and forgetting the same discipline on the mating parts.
Precision Grade and Runout: What to Ask For
Precision grade is a cost and delivery decision as well as an accuracy one. Our grinding reaches P2 class, and runout is controlled within 1.5 μm with 100% inspection before shipment. That does not mean every axis needs P2. Use the table as a starting point, then confirm against your own error budget.
| Grade | Fits | When it is not enough |
|---|---|---|
| P5 | General indexing and positioning where repeatability matters more than absolute runout | Axes tied directly to a surface finish or form accuracy target |
| P4 | CNC rotary tables, robot joints, and automation axes with tight repeatability | Ultra low runout work such as grinding or metrology |
| P2 | Gear grinding, semiconductor, and measurement axes where runout directly affects the part | Not justified where the housing and spindle cannot hold the same tolerance |
Two of our supplied cases show the range. For a customer in Mexico we supplied P2 rotary table bearings for gear grinding. For a customer in Germany we supplied crossed roller bearings for semiconductor equipment. Both applications are sensitive to runout and vibration, and both call for the same discipline on mounting parts. Our Quality Control page explains how we inspect before shipment.
Worked Example: Indexing Table on a Machine Tool
This is an illustrative scenario, not a customer case. A builder is designing a compact indexing table for a machine center. The inner ring rotates, the table is horizontal, the load is mostly axial weight plus a moderate tilting moment from side cutting, and the accuracy target is tight repeatability on every indexed position.
Ring rotation: inner ring rotating. Design the clamp plate to seat the split inner ring evenly.
Orientation: horizontal axis. Axial weight is constant, so the shoulder must support the full table load.
Preload: light negative clearance for stiffness. Check motor torque against the added friction.
Runout: P4 as the starting grade. Move to P2 only if the part tolerance justifies a tighter housing too.
Check back: if the tilting moment grows with larger tools, review the case with a larger bearing or a BRT Rotary Table Bearings option. See our page on Bearings for Machine Tools for related applications.
Common Mistakes When Matching RE Bearings
Choosing by bore and outside diameter only. Dimensions match, but the ring configuration may not suit your clamping design.
Treating preload as a fixed number. It is a trade between stiffness and heat, and your axis sets the balance.
Ordering P2 to fix a housing problem. Housing form errors pass straight through to the raceway.
Uneven bolt torque on the retaining plate. Tighten in a cross pattern, in stages, and measure runout after each stage.
Ignoring lubrication. A low torque axis needs the right grease and fill amount. Overfilling raises friction.
Mixing up series. RB, RE, and RU differ in which ring is split or integral. Confirm the series against the drawing. If you are comparing, review our BRE Series Crossed Roller Bearings page for the dimension tables.
Pre-Release Checklist for Your Rotary Axis Drawing
Rotating ring and stationary ring are marked on the drawing.
Axial, radial, and moment loads are listed with directions and peak values.
The clamping plate or shoulder supports the split ring evenly.
Preload class is chosen and the friction torque is checked against the drive.
Precision grade (P5, P4, or P2) matches the housing and shaft tolerances.
Lubricant type and fill are specified.
Mounting sequence and bolt torque are written into the assembly instruction.
If your design needs non standard dimensions or mounting holes, BY Bearings supports OEM customization. We have 15+ years of precision bearing manufacturing behind that work, and shipments carry a 12 month warranty from the shipment date. Many of our bearings also serve Bearings for Industrial Robotics, where the same preload and runout logic applies.
Send your drawing, load case, and accuracy target to the BY Bearings engineering team, and we will review the ring rotation, preload, and runout fit with you. You can get a quote or ask for selection advice before you finalize the design.
 +8618939019135
 sales@bybearings.com
 +8618939019135